Git based CMS for Jekyll using GitHub Actions – Part 1
In this multi post series we are going to be building a git-based headless CMS. We will be using Jekyll to build our website, GitHub actions for building a continuous delivery pipeline that will deploy our website to Azure. We will leverage the infinite scalability of Azure storage account’s blob storage along with Azure CDN to reduce the load time for our users around the world.
What is a Git-based CMS?
A git-based CMS allows users to leverage git as a single source of truth for all their content, i.e., blog posts, website theme, plugins, assets etc. Every time a user pushes a change (a change can be anything from adding a new post to updating a older post to adding a plugin or changing the theme) to the master/main branch, a pipeline will be triggered that will build and deploy the website.

Advantages of a git-based CMS
- Version control for everything – Images, scripts, plugins, content, theme etc are version controlled out of box
- Easy rollback – Just rollback the bad commit and the pipeline will take care of the rest
- Ability to leverage git branches to work on multiple things at the same time - When one post or update is complete, just merge that branch to master/main and the pipeline will take care of the rest
- Ability to leverage the pull request feature for an easy review process – A pipeline will deploy the changes made in the pull request to a non-public website to make it easy for reviewers to view changes
- No vendor lock in – Don’t want to use GitHub? You can use GitLab or an on-premises git server. Don’t want to use Azure? You can make use of AWS or GCP or IBM cloud. Even switching from one cloud provider to the other is as simple as updating the pipeline(s)
Disadvantages of git-based CMS
- Not easy to use for non-technical users
- Might not be the best if your content is changing rapidly
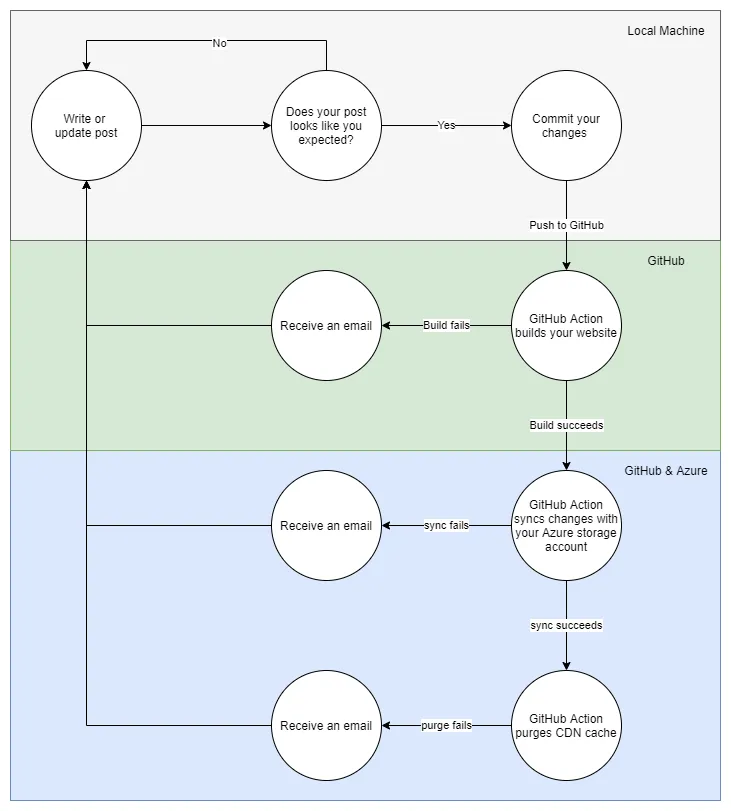
High level architecture
Given below is a diagrammatic representation of what we are going to be building.
Let us jump right into it shall we?
What is Jekyll?
Jekyll is a simple, blog-aware, static site generator. It is written in Ruby and it is distributed under the open source MIT license.
Jekyll does what you tell it to do — no more, no less. It doesn’t try to outsmart users by making bold assumptions, nor does it burden them with needless complexity and configuration. Put simply, Jekyll gets out of your way and allows you to concentrate on what truly matters: your content.
– Jekyll readme file
Why not WordPress like 38% of the internet?
Unlike WordPress that needs to be run on servers (that we must manage, scale, maintain, and secure), Jekyll generates good old HTML and CSS files which can be hosted on any object store such as Azure Storage Accounts (or Amazon Web Services’ S3). We do not have to manage, scale, maintain and secure any compute infrastructure or databases.
We can leverage the “only pay for what you use” model to lower our costs. We only need to pay for the storage we use and the amount of data that we transfer to our users. In the case of WordPress, we will need pay a fixed monthly cost irrespective of the amount of data that we store or the amount of data we serve to our users.
Let’s build our website
I will be using Ubuntu running in WSL2 on Windows. You will be able to follow along using any operating system, as all the tools we will be using are available for all the major operating systems.
Step 1 – Prerequisites
Install Jekyll for your operating system by following the instructions provided here. Verify that you have installed Jekyll correct by typing “jekyll -v” in your command line. You should see something like this:
$ jekyll -v
jekyll 4.1.1
Install git for your operating system by following the instructions provided here. Verify that you have installed git successfully by typing “git –version” in your command line. You should see something like this:
$ git --version
git version 2.25.1
Install Visual Studio Code by following the instructions provided here.
Step 2 – Create a website
Navigate to the directory where you want to save your blog and run “sudo jekyll new my-awesome-site” to create a new Jekyll site. You can replace “my-awesome-site” with any name you choose. Jekyll will create a folder called “my-awesome-site” and it will scaffold a basic website for you inside that folder.
$ sudo jekyll new my-awesome-site
[sudo] password for lalit:
Running bundle install in /mnt/c/Users/lalit/blog/my-awesome-site...
  Bundler: Fetching gem metadata from https://rubygems.org/..........
  Bundler: Fetching gem metadata from https://rubygems.org/.
  Bundler: Resolving dependencies...
  Bundler: Using public_suffix 4.0.5
  Bundler: Using addressable 2.7.0
…
…
New jekyll site installed in /mnt/c/Users/lalit/blog/my-awesome-site.
Now navigate to the “my-awesome-site” directory and run “sudo bundle exec jekyll serve” to start serving your website on localhost
$ cd my-awesome-site/
$ sudo bundle exec jekyll serve
Configuration file: /mnt/c/Users/lalit/blog/my-awesome-site/_config.yml
            Source: /mnt/c/Users/lalit/blog/my-awesome-site
       Destination: /mnt/c/Users/lalit/blog/my-awesome-site/_site
 Incremental build: disabled. Enable with --incremental
      Generating...
       Jekyll Feed: Generating feed for posts
                    done in 1.399 seconds.
    Server address: http://127.0.0.1:4000/
  Server running... press ctrl-c to stop.
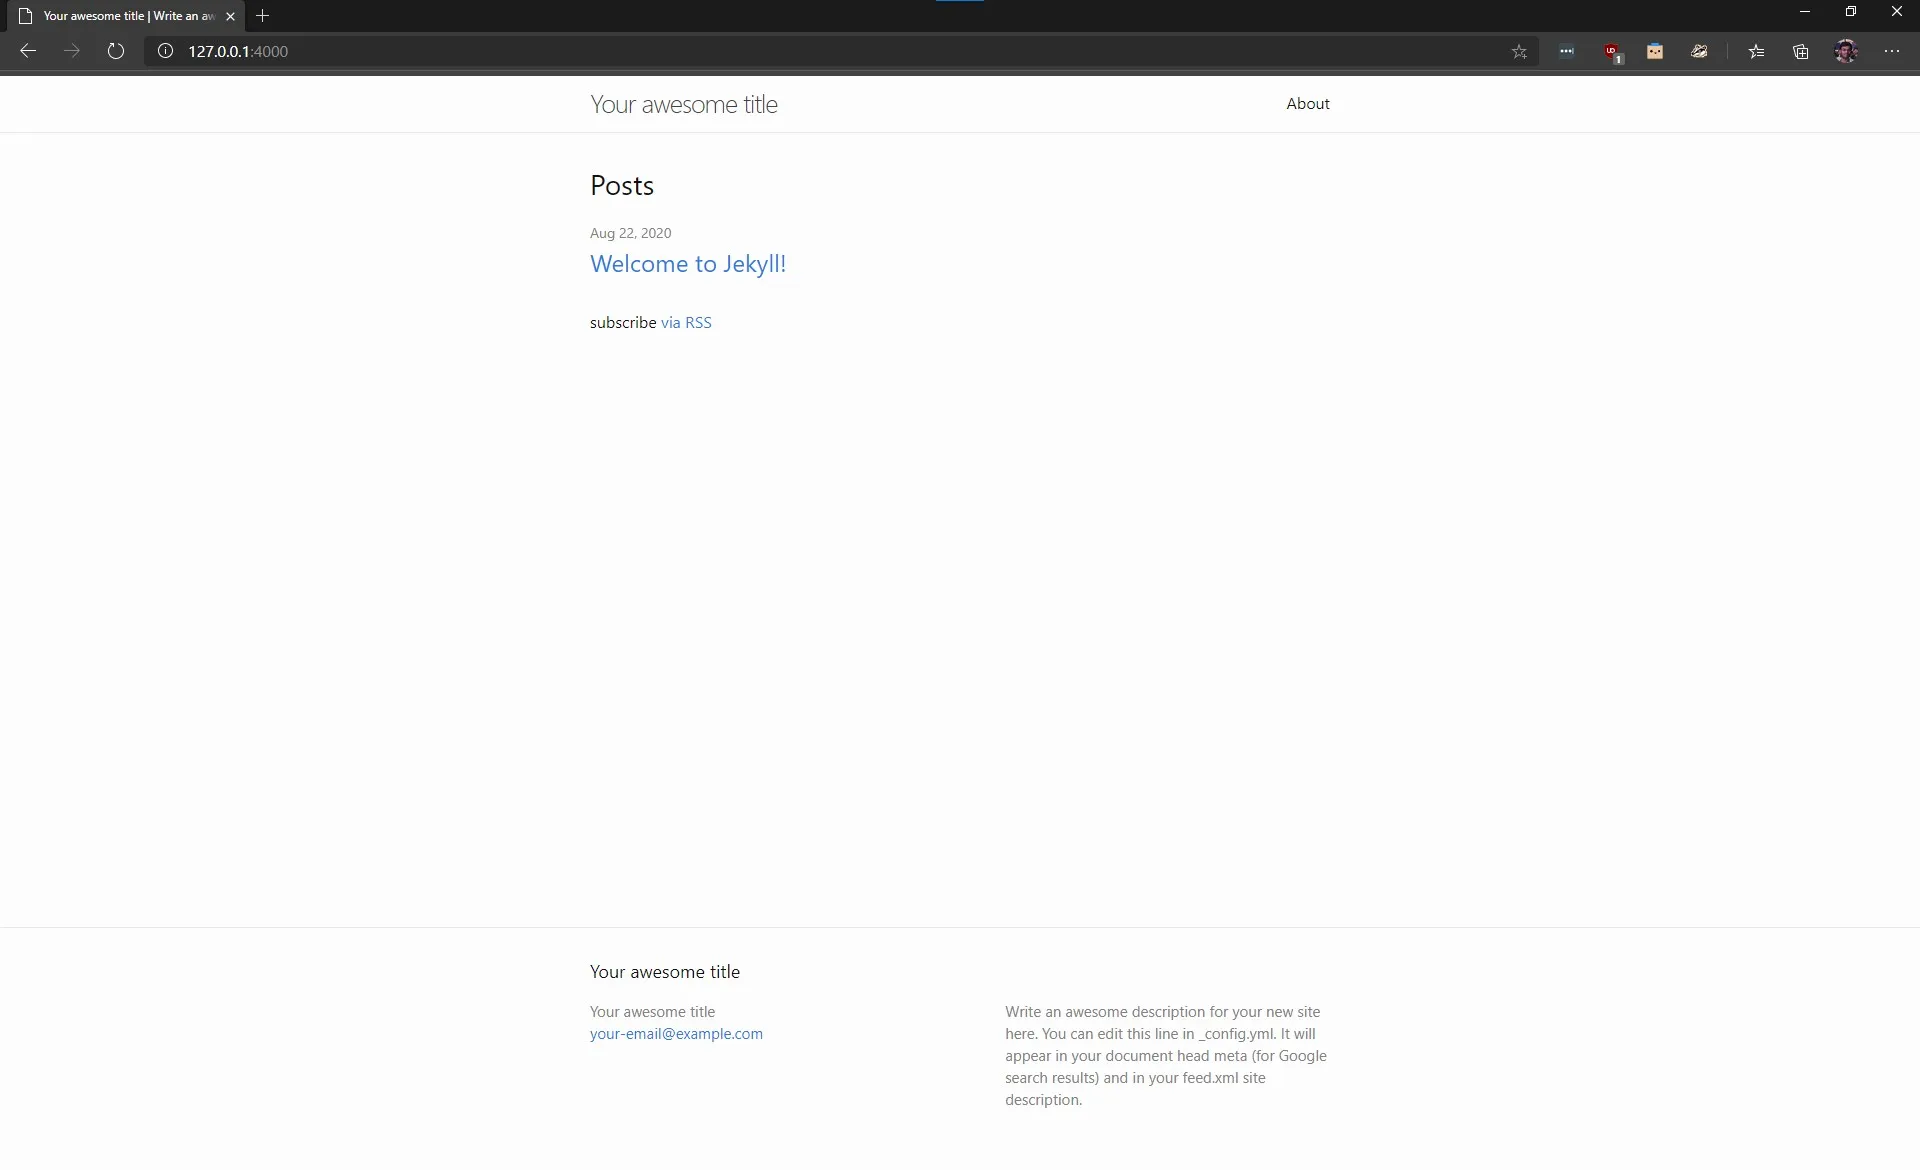
Open your favourite web browser and navigate to http://127.0.0.1:4000/. You should be able to see your website and it should look something like this
Open the “my-awesome-site” folder in Visual Studio Code. Let us examine the contents of that folder to better understand what Jekyll has created for us.
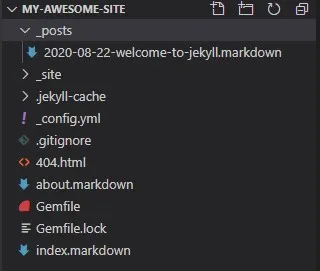
- _posts – This folder will contain all your blog posts. Right now, we have only one blog post that is titled “Welcome to Jekyll”. The naming convention of these files are important. All files in the posts folder must follow the naming convention - YEAR-MONTH-DAY-title.markdown
- _site – This folder contains that the generated HTML and CSS files. We will be uploading the contents of this directory to our hosting provider.
- _config.yml – This file contains the configuration information about the site. Configuration items include the title of your website, your email address, the theme you are using, the plugins you have enabled etc.
- 404.html – This is the file that will be rendered when a user tries to visit a link that does exist on your website
- about.markdown – This file contains the contents for the “about” page
- index.markdown – This file contains the contents for your website’s homepage
- Gemfile – Jekyll is written in Ruby, therefore, all your themes, plugins are ruby gems. The Gemfile tells ruby what gems to install for your website can to work as expected
Step 3 – Create a git repository
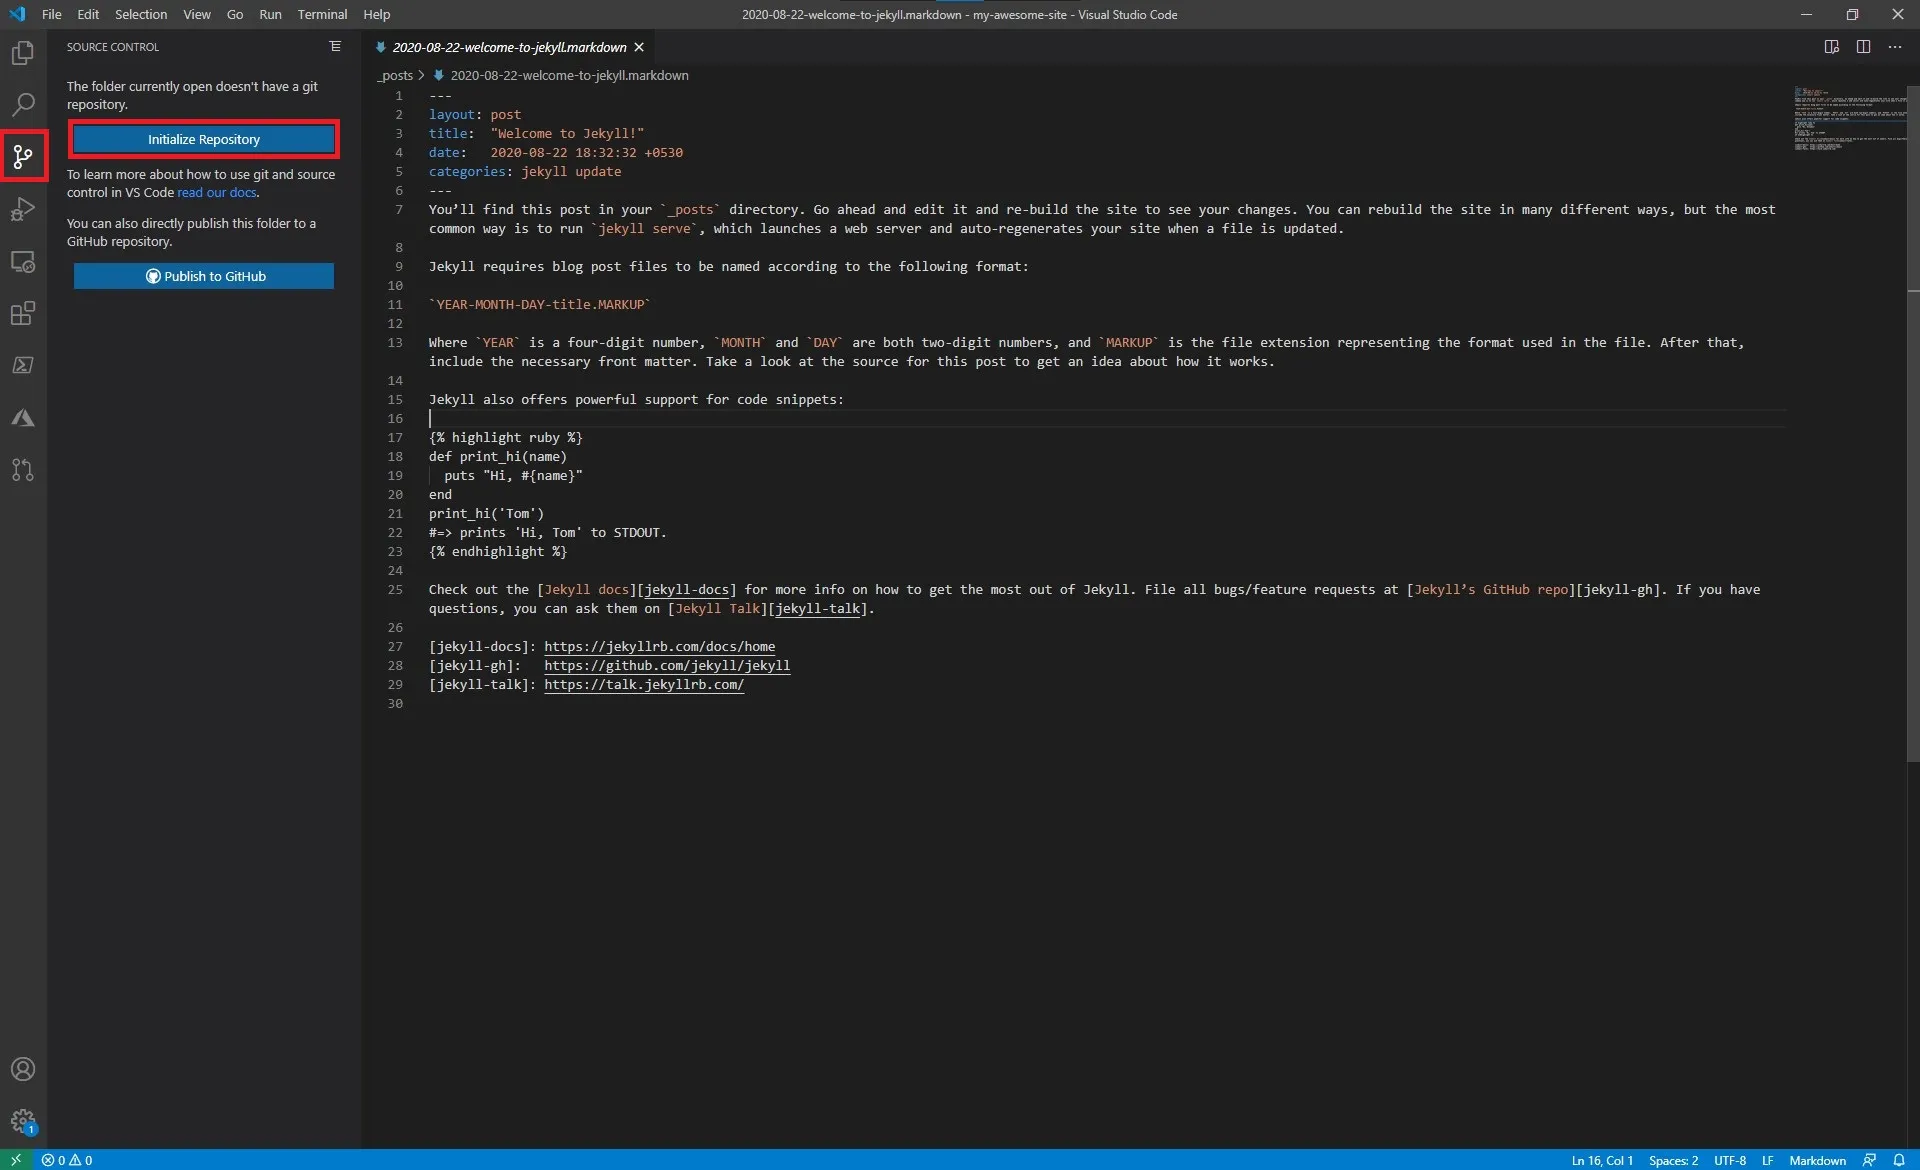
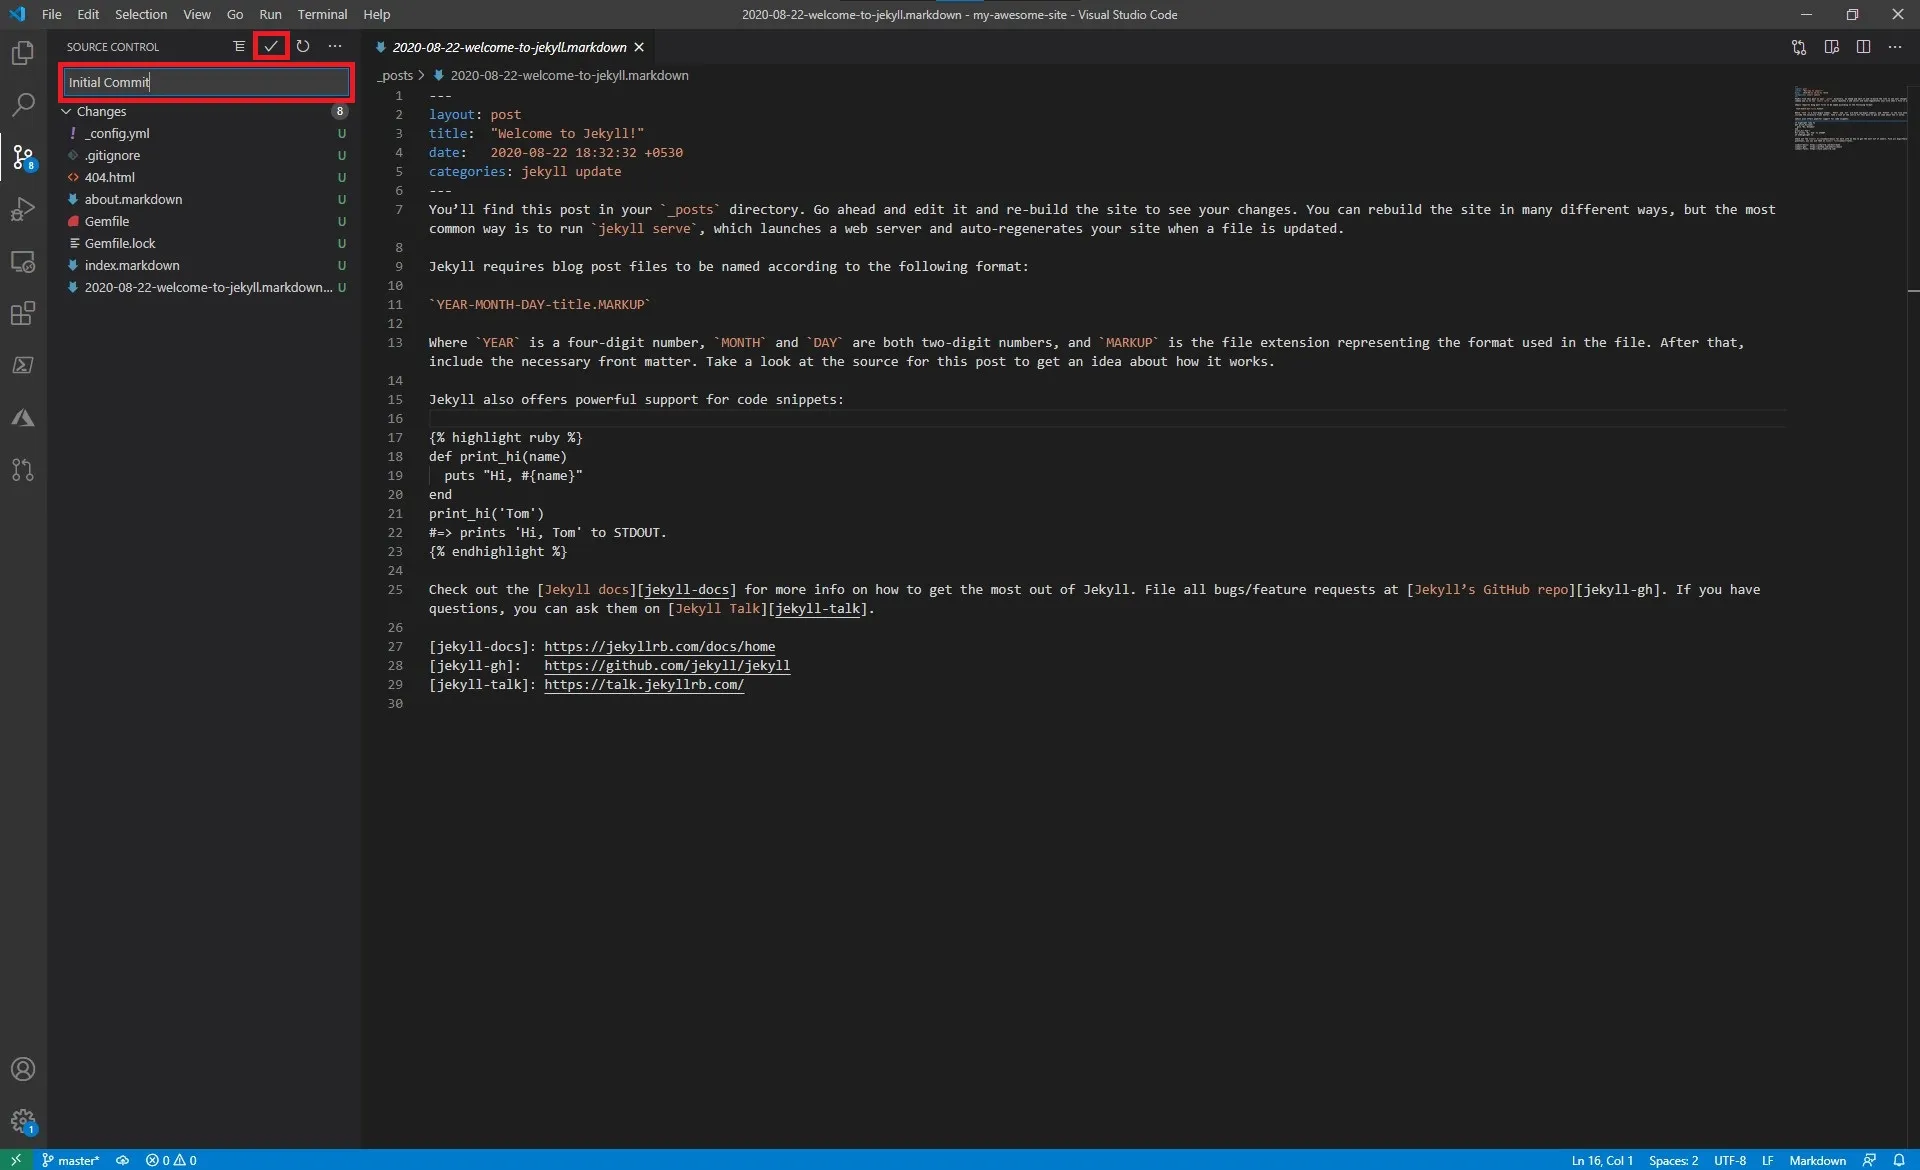
Now that we have a basic understanding of the folder structure, let us “save” our progress so far by creating a git repo and committing our files. To do that, click on the “Source Control” icon in the left navigation bar in Visual Studio Code and click on initialize repository.
Give it a few seconds for it initialize the git repository and once it is done, you should see a text box asking for a message. Give a message like “Initial commit” and then click on the check mark as shown.
Conclusion
In this post we learned about git-based CMS and then we created a basic website using Jekyll. In the upcoming posts, we will set up the necessary resource on Azure and host our website.